Mastering Remote Access For Your Raspberry Pi
Hey there, tech enthusiasts! Let’s dive into the world of remote Raspberry Pi access. Whether you're running a home automation system or deploying cutting-edge IoT solutions, knowing how to connect to your Raspberry Pi from anywhere is a game-changer. This guide will walk you through step-by-step instructions, expert tips, and best practices to ensure your setup is secure, efficient, and ready for action.
In today's fast-paced world, where remote work and IoT projects are skyrocketing, the need for reliable remote access solutions has never been higher. The Raspberry Pi, with its affordability and versatility, has become the go-to platform for tech-savvy individuals. But here’s the thing—connecting your Raspberry Pi remotely isn’t just about plugging it into the internet. It’s about understanding networking principles, security protocols, and configuration techniques. Stick with me, and I’ll break it all down for you.
This article is your ultimate guide to remote Raspberry Pi access. From setting up SSH connections to configuring advanced security measures, we’ve got you covered. By the time you finish reading, you’ll have the confidence and tools to manage your Raspberry Pi devices from anywhere on the planet. So, let’s get started!
Read also:The Untold Story Of King Von A Closer Look At The Man Behind The Music
What You’ll Find in This Guide
- The Basics of Remote Access for Raspberry Pi Devices
- Understanding What Makes Raspberry Pi So Special
- How to Set Up SSH for Secure Remote Access
- Why and How You Should Use a VPN
- The Ins and Outs of Port Forwarding
- Simplifying Remote Access with Dynamic DNS
- Top Security Practices for Remote Access
- Setting Up Remote Desktop Access
- Troubleshooting Common Issues Like a Pro
- Wrapping Up and What’s Next
The Basics of Remote Access for Raspberry Pi Devices
Remote access might sound like something only tech wizards can pull off, but trust me, it’s simpler than you think. It’s all about controlling and interacting with your Raspberry Pi from a distant location. This feature is incredibly useful for managing servers, monitoring IoT setups, or even accessing files stored on your device. The Raspberry Pi, with its lightweight design and open-source support, is the perfect platform for remote access applications.
Now, there are several methods to achieve remote access, and each comes with its own set of benefits and challenges. Figuring out which method works best for your needs is key to a successful setup. Whether you're a beginner or a seasoned pro, understanding the basics is crucial.
In this section, we’ll talk about the fundamental concepts of remote access, the cool benefits it offers, and the potential risks involved. We’ll also touch on why security is so important in remote access setups, setting the stage for deeper discussions in the sections ahead.
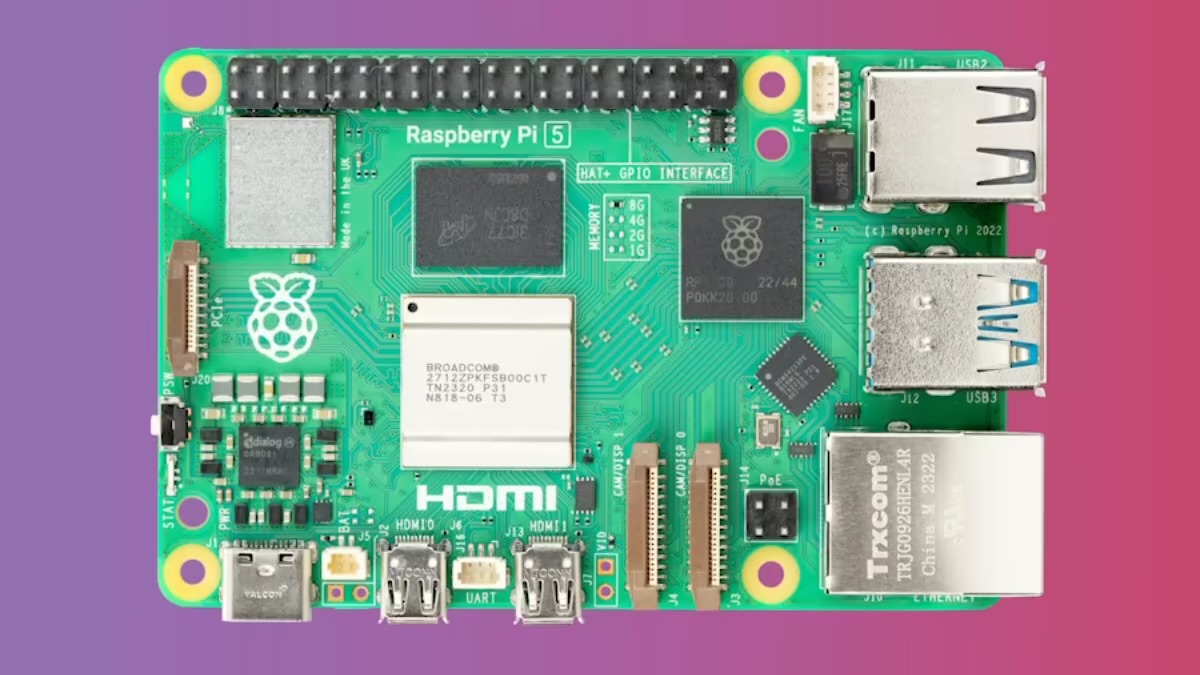
Understanding What Makes Raspberry Pi So Special
What Exactly is a Raspberry Pi?
A Raspberry Pi is more than just a tiny computer—it’s a powerhouse that can handle everything from basic computing tasks to complex IoT projects. It runs on a Linux-based operating system and is celebrated for being affordable, versatile, and easy to use. Think of it as the Swiss Army knife of the tech world.
Before we dive into remote access, let’s break down the basics of the Raspberry Pi. Familiarizing yourself with its hardware and software components will make troubleshooting and optimizing your remote access setup much easier. Knowing how the device works under the hood is half the battle won.
Why Choose Raspberry Pi for Remote Access?
- Compact and Energy-Efficient: The Raspberry Pi is small but mighty, making it perfect for remote setups where space and power are limited.
- Support for Multiple Operating Systems: Whether you’re using Raspbian, Ubuntu, or another OS, the Raspberry Pi has got you covered.
- Wide Range of GPIO Pins: These pins allow you to interface with external devices, opening up endless possibilities for remote projects.
- Community-Driven Support: The Raspberry Pi community is one of the most supportive and resourceful out there. You’ll never be short of help or inspiration.
These features make the Raspberry Pi an ideal choice for remote access applications, catering to both beginners and advanced users alike.
Read also:Katiana Kay Erome The Star Who Keeps Shining
How to Set Up SSH for Secure Remote Access
SSH (Secure Shell) is like the Swiss Army knife of remote access methods. It creates a secure and encrypted connection, letting you interact with your Raspberry Pi from anywhere in the world. It’s like having a virtual key to your device, no matter where you are.
Setting up SSH on your Raspberry Pi is straightforward. Here’s how you do it:
- Enable SSH by running the command
sudo raspi-configand navigating to the SSH option. It’s like flipping a switch to unlock the door to your Pi. - Make sure your Raspberry Pi is connected to the internet. Without an internet connection, SSH won’t work—it’s that simple.
- Use an SSH client on your remote device to connect to the Pi’s IP address. Think of this as dialing a number to call your Pi.
SSH is great because it’s easy to set up and offers strong encryption. But remember, security is key. Implementing extra security measures will keep your device safe from unwanted visitors.
Why and How You Should Use a VPN
What is a VPN Anyway?
A Virtual Private Network (VPN) creates a secure tunnel between your device and your Raspberry Pi. It’s like having a private road that only you can use, ensuring that all data transmitted between the two is encrypted. This makes it a top choice for remote access, especially when sensitive information is involved.
There are several VPN solutions available for Raspberry Pi, and each has its own strengths. Here are some popular options:
- OpenVPN: A tried-and-true solution that’s been around for years.
- WireGuard: Known for its speed and simplicity, WireGuard is gaining popularity fast.
- Tailscale: A newer player in the game, Tailscale offers an easy-to-use interface and robust features.
Your choice depends on your specific needs and technical expertise. Don’t worry—there’s something for everyone.
Setting Up a VPN on Raspberry Pi
Configuring a VPN on your Raspberry Pi involves a few steps, but with the right guidance, it’s a breeze. You’ll need to install the necessary software, generate certificates, and set up the server-client architecture. Detailed guides are available for each VPN solution, ensuring a smooth setup process.
The Ins and Outs of Port Forwarding
Port forwarding is like giving your Raspberry Pi a direct line to the outside world. It allows external devices to access specific ports on your Pi, enabling remote access. This is especially useful when using services like SSH or VNC, which require specific ports to be open.
To configure port forwarding, you’ll need to access your router’s settings and map the desired port to your Raspberry Pi’s local IP address. Most modern routers have user-friendly interfaces that make this process a cinch. Just remember, securing these ports with strong passwords and firewalls is crucial to keeping unauthorized access at bay.
Simplifying Remote Access with Dynamic DNS
Dynamic DNS (DDNS) is like giving your Raspberry Pi a permanent address, even if its IP address changes. It assigns a static domain name to your Pi, eliminating the hassle of updating the IP address every time it changes. This makes remote access a whole lot easier.
There are plenty of DDNS providers out there, and many offer free plans. Some popular ones include No-IP, DuckDNS, and Dynu. These services are perfect for personal and small-scale projects.
Here’s how you set up DDNS for your Raspberry Pi:
- Create an account with a DDNS provider and register a domain name. Think of it as naming your virtual home.
- Install the DDNS client software on your Raspberry Pi. This is like installing a mailbox for your virtual address.
- Configure the client to update the domain name with your current IP address. It’s like keeping your mailbox current with your real-world address.
DDNS significantly enhances the convenience of remote access, making it a must-have for Raspberry Pi users.
Top Security Practices for Remote Access
When it comes to remote access, security should always be your top priority. Here are some best practices to keep your Raspberry Pi safe:
- Use Strong, Unique Passwords: Weak passwords are like leaving your front door unlocked. Don’t do it!
- Enable Two-Factor Authentication (2FA): Adding an extra layer of security is always a good idea. Think of it as a second lock on your door.
- Regularly Update Your Software: Keeping your Pi’s operating system and software up to date is like giving your device a regular check-up.
- Limit Access to Trusted IP Addresses: Using firewall rules to restrict access to only trusted IPs is like having a bouncer at your door.
- Monitor Access Logs: Keeping an eye on who’s coming and going is crucial for catching any suspicious activity.
By implementing these measures, you’ll protect your Raspberry Pi from potential threats and ensure a secure remote access experience.
Setting Up Remote Desktop Access
What is Remote Desktop?
Remote desktop access lets you view and interact with the graphical interface of your Raspberry Pi from a remote device. It’s perfect for applications that require a graphical user interface (GUI). Imagine being able to control your Pi’s desktop as if you were sitting right in front of it.
To set up remote desktop access, you can use tools like VNC (Virtual Network Computing) or XRDP. Both are powerful options, but VNC is the fan favorite in the Raspberry Pi community.
Configuring VNC on Raspberry Pi
Setting up VNC on your Raspberry Pi is simple. Here’s how:
- Install the VNC server software on your Raspberry Pi. Think of it as setting up a virtual office.
- Set up a password for secure access. This is like locking the door to your virtual office.
- Install a VNC client on your remote device and connect to the Raspberry Pi’s IP address. It’s like walking into your virtual office from anywhere in the world.
VNC offers a user-friendly interface and reliable performance, making it an excellent choice for remote desktop access.
Troubleshooting Common Issues Like a Pro
Even with the best planning, issues can pop up when setting up remote access for your Raspberry Pi. But don’t worry—I’ve got you covered with some common problems and their solutions:
- Connection Issues: Double-check that your Raspberry Pi is connected to the internet and that you’re using the correct IP address or domain name. It’s like making sure you have the right key to unlock the door.
- Authentication Failures: Verify that your username and password are correct and that 2FA is properly configured. It’s like checking your ID before entering a secure building.
- Firewall Blocks: Review your router’s firewall settings and ensure the necessary ports are open. Think of it as making sure the gate to your property is open.
- Software Conflicts: Update your Raspberry Pi’s software and restart the device if needed. It’s like rebooting your system to fix any glitches.
Addressing these issues promptly will keep your remote access experience smooth and uninterrupted.
Wrapping Up and What’s Next
Remote access for Raspberry Pi devices opens up endless possibilities. It lets you manage and interact with your devices from anywhere in the world. By following the steps in this guide, you’ll have a secure and efficient remote access system tailored to your needs. It’s like having a superpower in your pocket.
As you continue exploring the capabilities of your Raspberry Pi, don’t be afraid to experiment with
Article Recommendations